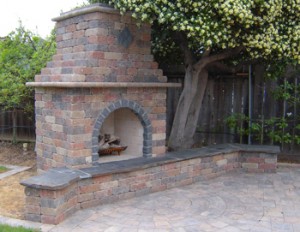
Hardscape

Roman Stone
What is it?
Roman Stone is a modular multi-colored concrete unit that is adhered together with concrete adhesive to create commonly used outdoor structures including:
History of Outdoor Structures
Not long ago these structures were built using traditional brick and mortar methods. This method of construction is time consuming and requires a high level of construction expertise. The cost of mortared masonry construction made outdoor entertainment areas unaffordable for many homeowners.
The Roman Stone Advantage
Roman Stone combined with high performance concrete adhesive allows structures to be built utilizing simpler construction methods, saving time and money. Roman Stone’s modular design, versatility, and broad range of available colors, allow your backyard dream can go wherever your imagination takes you. Let us help you realize your backyard dream while adding value to your home.
Modular Construction Basics
Roman Stone can be easily arranged in symmetrical square or rectangular modules. The smallest module is created using 4 stones to make a 16″ x 16″ square. By adding additional stones the size of the module can be increased in 12″ increments in either direction. By using this concept you can create structures sized appropriately for your specific project. Pre-planning and trial layouts prior to final construction will enhance your construction experience and results.
Foundations
Roman Stone structures can be built on pavement or a compacted aggregate base. It is critical to understand that your project is only as good as the foundation it is built on. Suitable pavements include interlocking concrete pavers, asphalt, and concrete. Concrete and asphalt should be flat, and free of cracks or degradation with a minimum thickness of 4″. Interlocking pavers should be on a compacted base at least 4″ thick. The width of any pavement should allow full contact for the first course of the Roman Stone. This will ensure good stability for your project. In the absence of pavement ¾” class II or IV baserock should be used for the base. It is important that it is compacted, and free of organic soils. The thickness should be 6″ minimum and extend at least 2″ past the structure footprint. To ensure proper compaction, base material should be placed and compacted in 2″ intervals. The soil beneath the base material must be firm and stable. If soft soils exist, replace with additional compacted baserock.
First Course On base Rock
Preparation and layout will be the most time consuming, as well as the most important step in achieving a good installation. Ensure sure that the baserock is flat, level, and compacted. Layout the entire first course and level each stone front to back, side to side, and stone to stone. Use a plastic dead blow hammer as necessary to make small adjustments.
First Course On Pavement
Determine if the pavement is sloped. Many pavements appear flat and level, but in fact have a slight slope for water runoff. It is critical that the first course of Roman Stone is flat and level. Leveling adjustments can be made by shimming with thin pieces of wood, ceramic tile wedges, or other devices to hold the first course level until the adhesive sets up.
Adhesives
A quality concrete adhesive is all that is needed to bond Roman Stone units together. Adhesive should be applied to each stone on every course. Calstone recommends Alliance Gator Block Bond concrete adhesive. Before applying any adhesive, or starting the second course
• Layout the entire first course
• Confirm that it’s square and level
• Check all dimensions giving consideration to all structure components
• Remove loose debris and dust from bonding surfaces
Second And Successive Course Installation
Once you’ve established the base course, the second and successive courses are created by gluing the corners in the opposite direction of the first course. Repeat this process for each successive course while continually checking for square and level as you build. Building curves The easiest way to build a curved wall is to layout the stones leaving a gap on the outside of the curve. If you prefer to build the wall without gaps, some or all of the stones will need to be cut. Cutting can be done with a masonry saw, or by using a guillotine type block/stone splitter. Saw cuts are more precise, while guillotine splits are faster.
